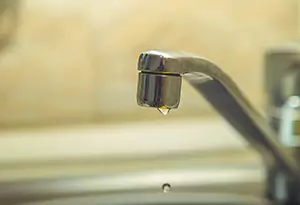
Is a dripping sound from your kitchen faucet getting on your last nerve? Maybe it’s time to take care of the leak. Most of the time, a leaky faucet isn’t hard to repair, depending on the nature of the drip and the type of faucet. Potential problems with faucets include worn-out seals, loose parts, broken plumbing, or corrosion.
Four types of faucets, including compression, cartridge, ball, and ceramic disk, can be found in most homes. Do your research and find out what type you have and how to fix it. There are plenty of how-to videos on the Internet. And while fixing a leaky faucet might seem like a formidable task, the hardest part is finding the proper replacement parts. If possible, it’s best to know what brand of faucet you have when figuring out how to fix it and buying replacement parts for it.
9 Steps to Take When Fixing a Basic Leaky Faucet
- Put together the proper tools for the task. Most leaky faucet repairs require an Allen or adjustable wrench, screwdrivers, slip-joint pliers, penetrating oil like WD-40, and replacement parts such as washers, O-rings, and repair kits.
- Before disassembling the faucet, turn off the water supply to it. Most shutoff valves are located underneath the sink. If the water supply doesn’t turn off from a valve underneath the sink, you may have to turn it off from the main shut-off valve to your home’s water supply. After turning off the water supply, move the faucet to the open position to drain any access water or relieve water and air pressure.
- Cover the sink drain holes with something to prevent any small parts from falling into them.
- Examine the faucet closely to see how it’s assembled and to see where the leak is located. Check the faucet’s aerator by unscrewing it and cleaning it out. Sometimes a clogged aerator can cause a drip.
- Disassemble the faucet and remember how the parts fit together for easy reassembly. Take photos or videos of the faucet. In fact, it’s smart to take photos or videos of each step of the disassembly process so you can put it back together correctly.
- Remove any decorative parts attached to the knobs or handles, then unscrew the handles and the stems with a screwdriver. The penetrating oil can help loosen any hard-to-remove screws.
- Once the faucet is apart, check it for mineral buildup, corrosion, or broken parts that may be causing the leak. Next, inspect the O-ring and washer inside the valve seat, if your faucet has these. (Only compression faucets use washers.) Remove these and replace them, as they are the usual culprit of a leak. Make sure the replacement parts are the correct size. If they are not, the leak may continue.
- Clean all the parts, including the interior, before reassembly. Basic vinegar works well when cleaning parts.
- Reassemble the faucet, then turn the water supply back on to test its function.
If your faucet is still leaking once you’ve checked all of the above, it might be time to call in a professional. If you don’t feel comfortable fixing a leaky faucet, it is an easy task for a plumber.


